
If you’re serious about photography, you already know there’s way more to it than pointing and shooting your subject. And the first step to leveling up your game is getting out of automatic mode. It’s time to go manual!
You might be avoiding making the switch because shooting in manual mode seems overwhelming at first. But it’s actually much easier than you think. With a little practice, you’ll wonder why you waited so long to make the leap from letting your camera make creative decisions for you to taking charge of the image-making process yourself!
Still on the fence? I’ll break down the “why”:
1. You Make the Decisions
With a high-quality DSLR set to one of the fully automatic modes, you’re basically using a big, heavy (and waaayyy too expensive) point-and-shoot camera. Sure, the camera will get it right once in a while, but it’s also just as likely to get it wrong.
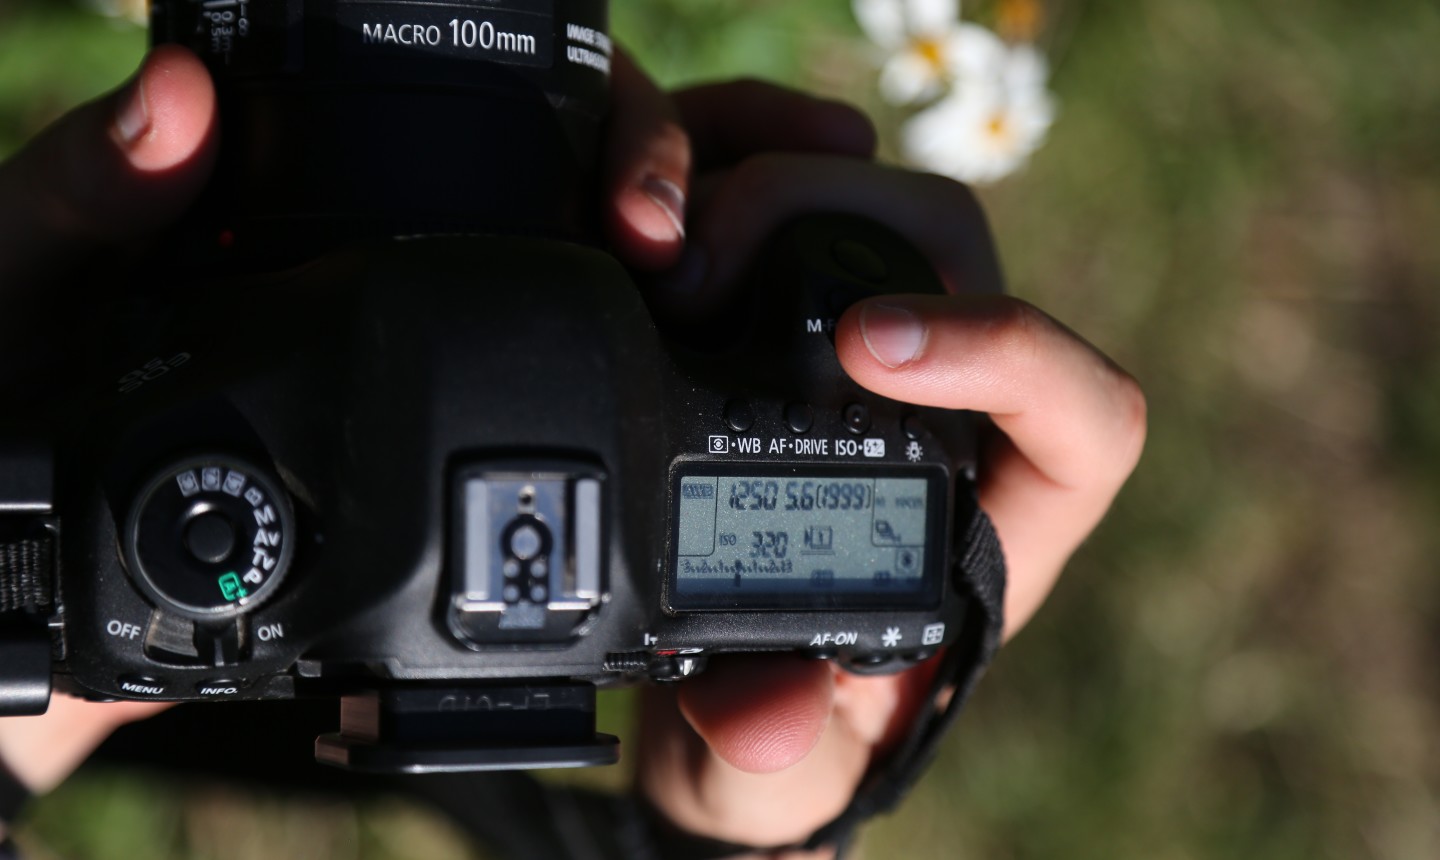
Besides framing the shot, you’re pretty much just along for the ride when you press the shutter. ISO, shutter speed, aperture, focus point and white balance are all chosen by the camera.
Let’s be real: this approach is creatively limiting. Leaving all of the decisions to the camera and what it thinks the exposure and the main point of focus should be won’t produce photos that reflect your point of view.
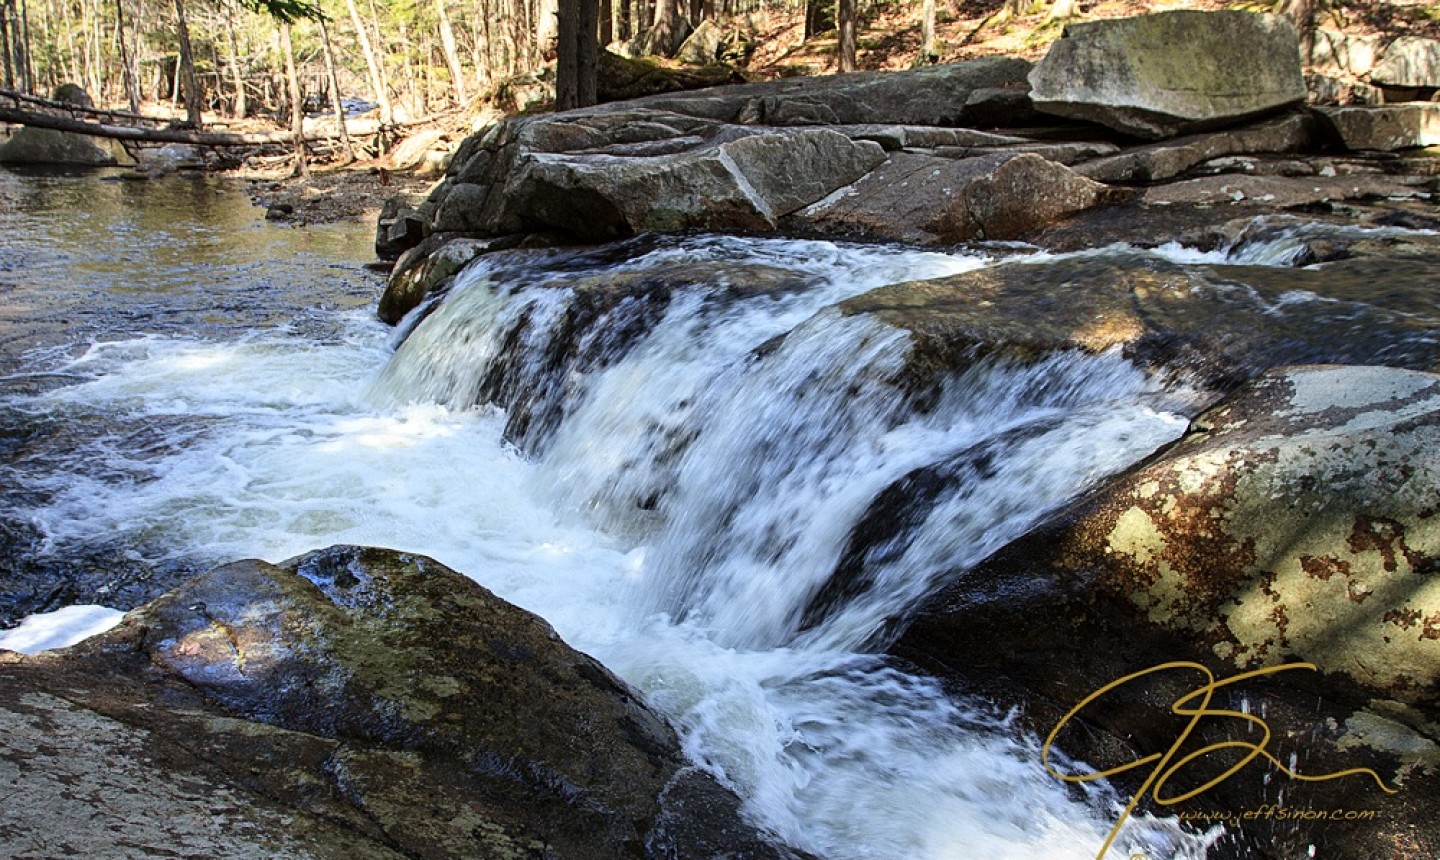
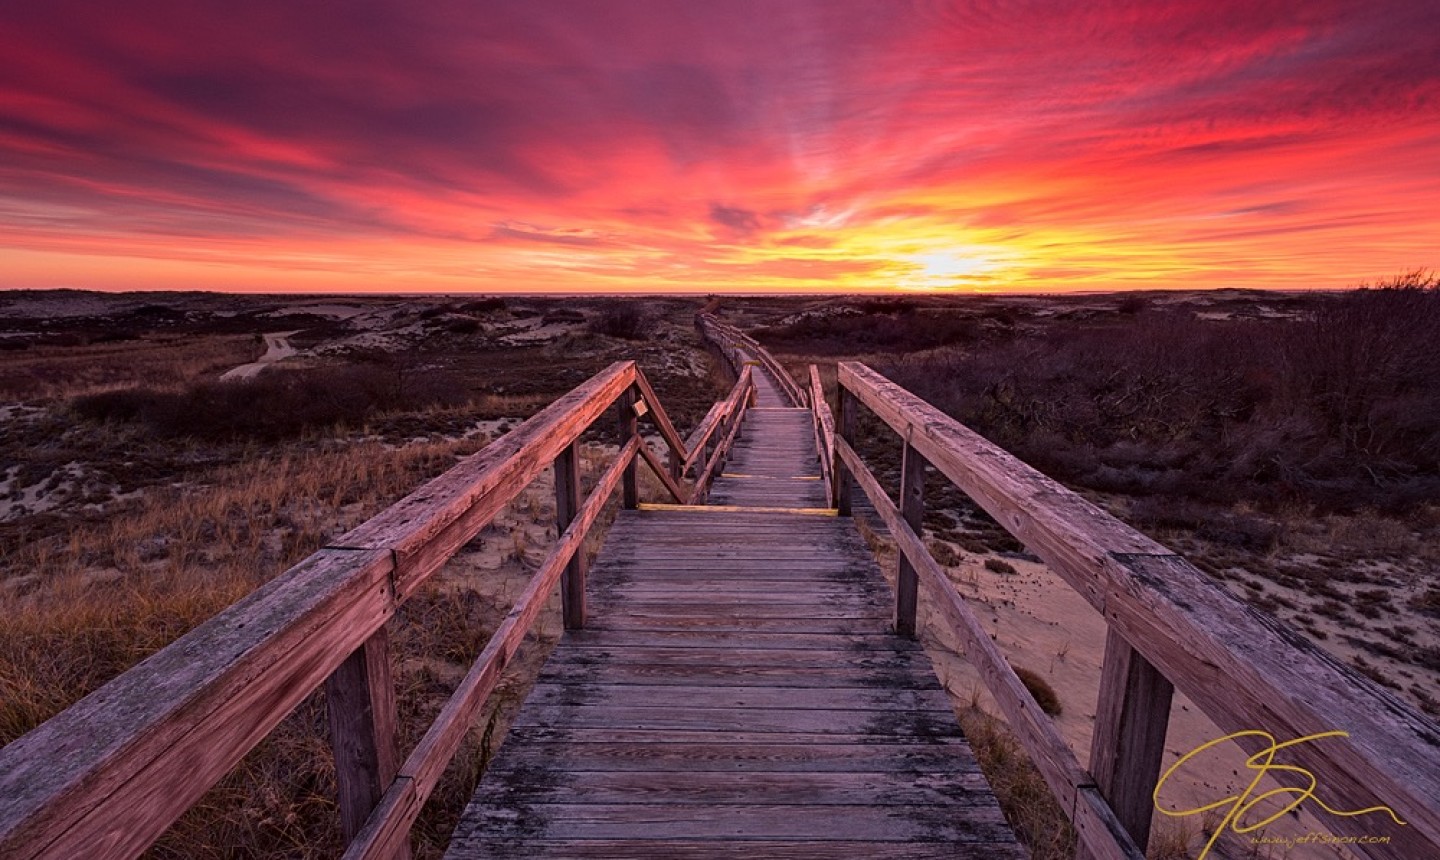
In the photo above, about the only thing the camera got “right” was the choice of ISO, which was 100. When it came to aperture and shutter speed, my camera decided on f/4.5 and 1/60th of a second, neither of which I would have chosen for a photo of moving water.
I would have used a much smaller aperture, something in the range of f/11 – f/16 for maximum depth of field, and a much longer shutter speed to maintain a good exposure and achieve a blurred look to the water. Something more like this…
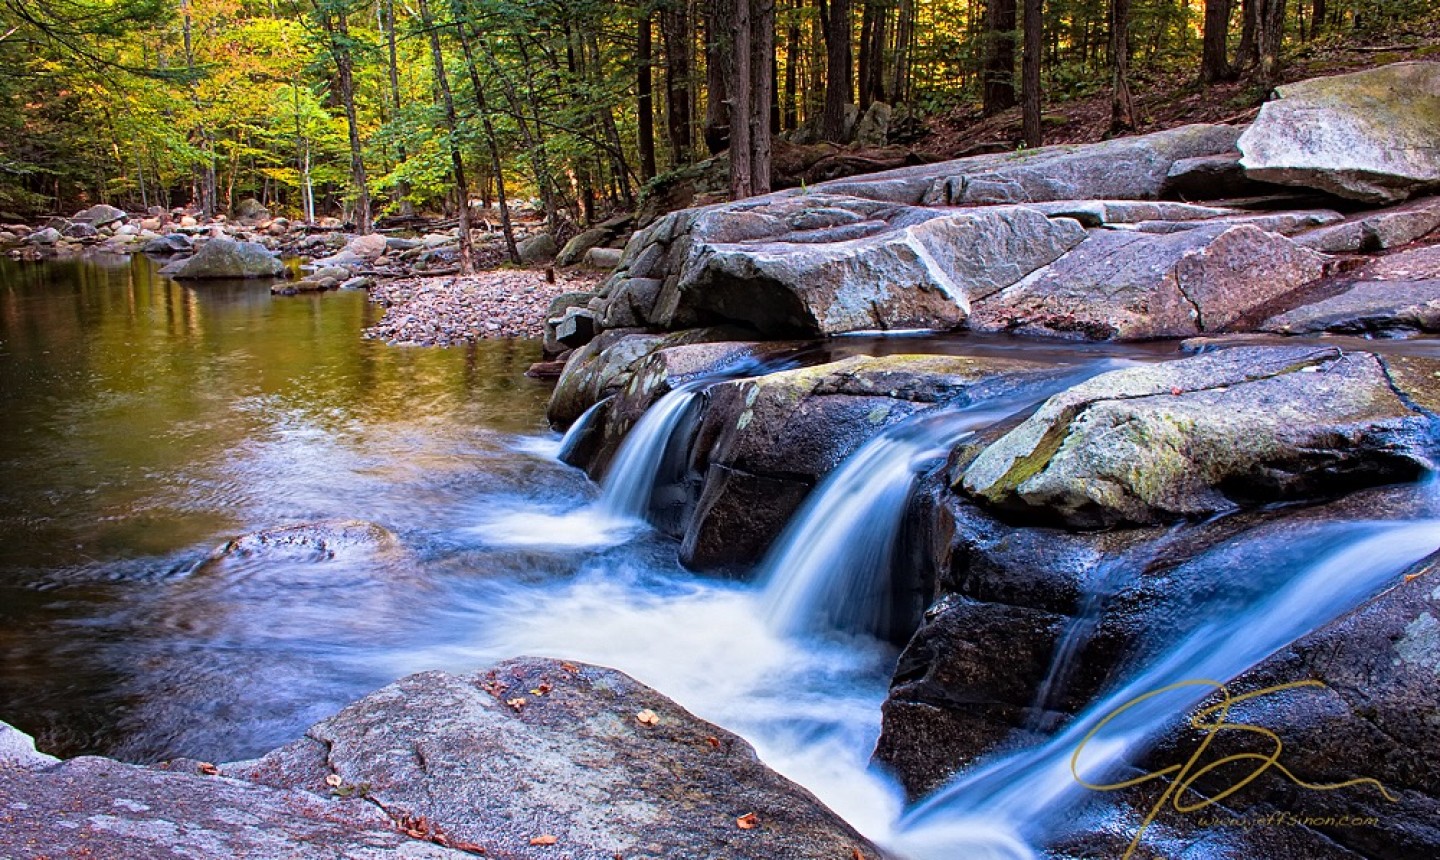
The difference is stunning — and proof that manual mode is always the way to go.
2. Digital Makes It Easy
On most modern DSLR cameras you can enable a histogram while in Live View or have the histogram displayed alongside the image preview after the shot. A histogram is essentially a graph that represents the tonal values in your image on a scale of blacks, shadows, midtones, highlights and whites.
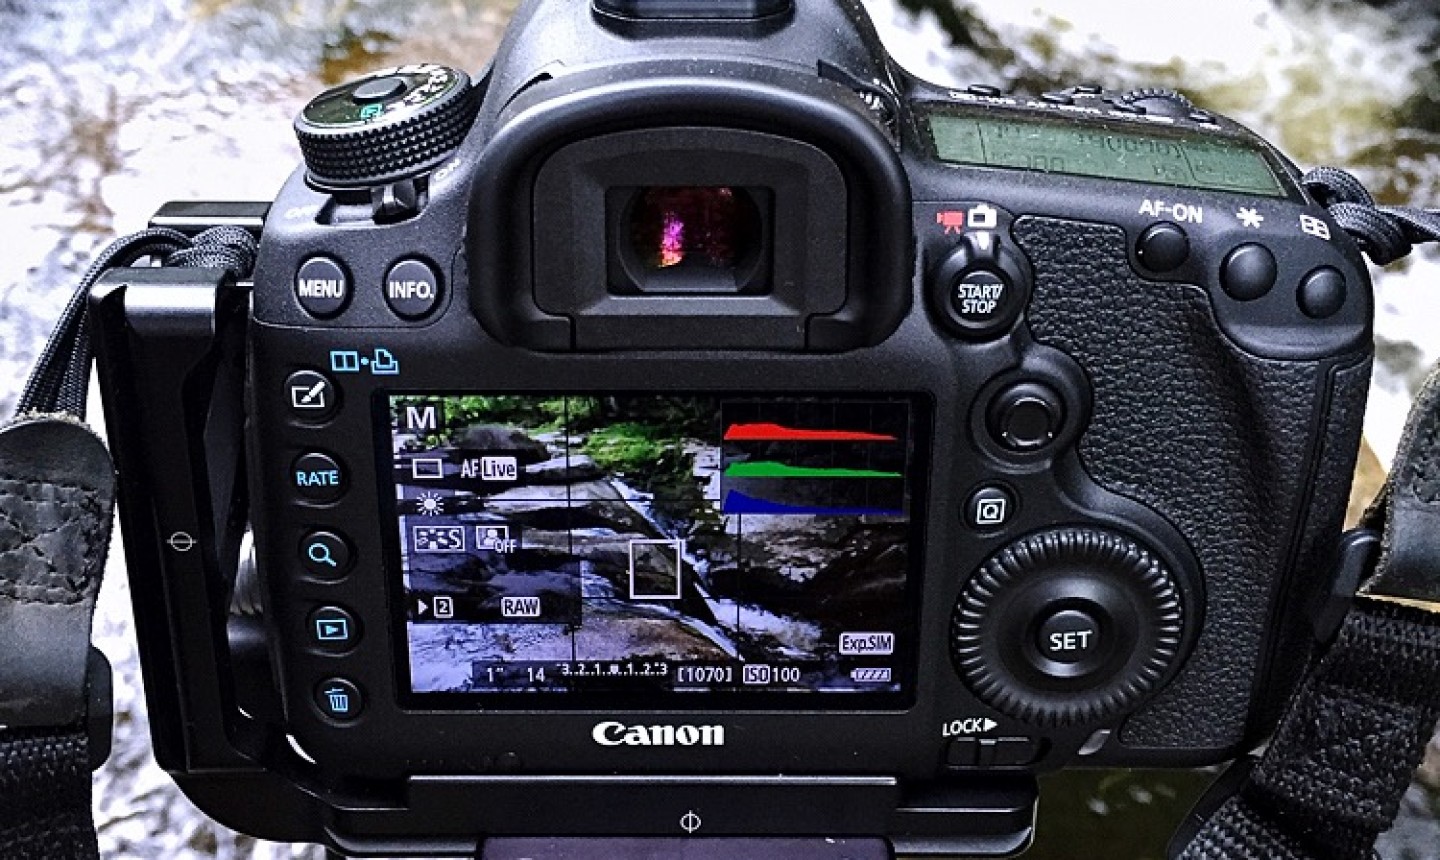
You can see the histogram displayed in the upper right-hand corner of this camera.
This information makes the move to manual mode oh-so-easy. Once you learn to read histograms, you can use them to determine whether your photo will be underexposed or overexposed and make adjustments to correct the exposure for A+ images. Any mistakes can also be corrected by using photo editing software like Photoshop or Lightroom later.
3. It’s So Satisfying
The No. 1 reason to make the switch to Manual mode is in knowing that the photos you make are 100 percent the result of choices you’ve made, with no influence from a piece of technology.
What You Need to Know Before Switching to Manual Mode
To succeed in manual mode, you have to get friendly with the exposure triangle of aperture, shutter speed and ISO. This means learning how changes in each element of the triangle affect exposure, and how to adjust all three achieve a good result.
1. Aperture
Aperture refers to the size of the opening that allows light to come through your lens. You can adjust the opening from a higher f-number (which lets very little light through) to a lower f-number (which allows light to flood in).
Along with light, aperture affects the depth of field of your photo — that is, how much of your image is in focus. This higher the f-number, the greater the depth of focus, and vise versa.
2. Shutter Speed
Shutter speed is exactly what it sounds like — how long the camera’s shutter remains open. The higher the shutter speed is, the lower the sensor is exposed to light. High shutter speed comes in handy with shooting fast-moving subjects, such as if you’re shooting a sports game. Lower and longer shutter speeds will blur moving elements of a photo.
3. ISO
ISO is the camera’s sensitivity to light. If you’re shooting in low light or experimenting with night photography, you’ll want to turn up the ISO so you can work with less light. But there’s a trade-off: if you turn the ISO up high enough, your photograph can come out grainy. Turning the ISO up not only makes your camera more sensitive to light, it also increases the shutter speed.
Good to Know: Learn more about aperture, shutter speed and in our class Basics of Digital Photography.
Thanks great article