
If you’re interested in selling your drawings, or perhaps have already started selling originals or submitting to art directors but would like to branch out into product offerings, greeting cards are a wonderful way to begin reproducing your artwork in a higher volume.
Not only are greeting cards a fantastic mini canvas for your illustrations, but they are also a practical item that people purchase and use on a regular basis.
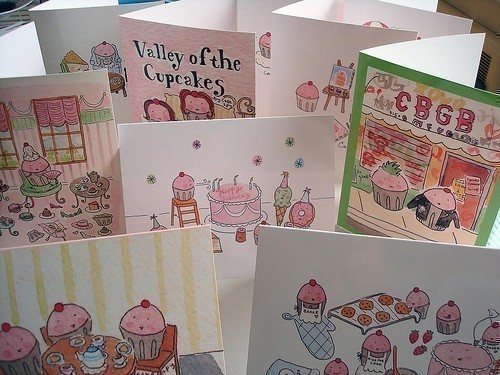
Illustrations and photos via CakeSpy
Working with printers and file formatting can seem quite daunting to the uninitiated, but once you break down the steps, it’s quite an accessible process. In this post, we’ll offer some helpful tips and considerations to help you get started in the wonderful world of greeting card production.
What type of art should you choose for greeting cards?
Naturally you want to choose your best work to reproduce on greeting cards. However, consider the fact that most people purchase greeting cards for specific occasions: birthdays, weddings, new baby, housewarming or thank you notes. Choosing artwork that is appropriate for these occasions will ultimately make your cards more salable, taking them from an “I want” item to a useful “I need” product.
Choose from common greeting card sizes
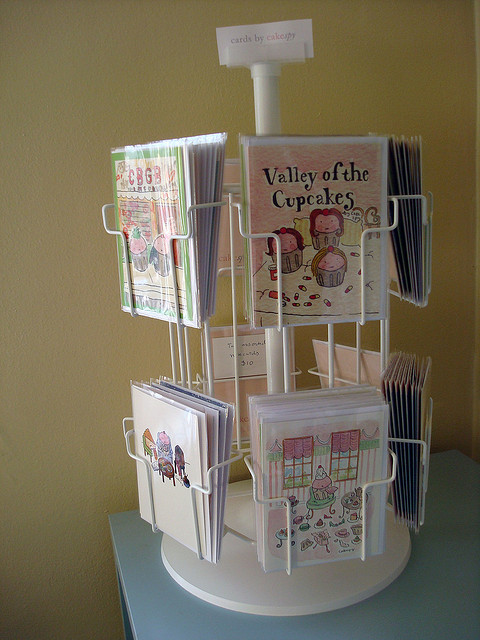
Generally, you will base the size of your cards on popular envelope sizes. This will not only make them easier to package and sell, but they will also to tend to fit better into standard card rack sizes, which makes them easier to merchandise in stores or at craft fairs.
Typical greeting card sizes include 4.25 by 5.5 inches, 4 by 6 inches, and 5 by 7 inches. If you’re working with a printer, be sure that the cards come with envelopes.
Note: Many find that the card size measuring 4.25 by 5.5 inches is a great format with which to begin your greeting card adventure. Why? It’s easy to print this size at home, since the unfolded measurements of the card, 8.5 by 5.5 inches, are exactly half of a standard 8.5 by 11-inch sheet of printer paper, meaning you can print them 2-up on a standard sheet.
Formatting your art
These tips will serve you well with a variety of different printers or for at-home printing. However, it’s worth noting that different printers will have varying specifics and criteria for printing, so be sure to closely review and adhere to them.
Scanning
Scan your art at a high resolution — at least 300 dpi. It is always better to reduce the size of your art rather than enlarge, as it can make it grainy in reproduction, so if your artwork is fairly small, scan at a higher resolution, which will naturally make the image size larger.
Scanning into a photo or image editing program can allow you to adjust your image to make it print-friendly.
Color correcting and image formatting
Once your image is scanned, you may want to do some light digital touch-ups, including adjusting the contrast or brightness of the image and removing dust spots. This is easy to do in image editing programs such as Photoshop.
Always double check the color format of your image and tailor it to your printer’s preferences. It is common for printers to request your file to be delivered in CMYK color, but this is not always the case as some prefer RGB color. Do check this, as it will be important in ensuring that the color matches what you see on the screen.
Template tech
Now it’s time to start thinking about the front, back, and inside of your card, and how these pieces will fit together.
Happily for beginners, it is increasingly common for printers to offer design interfaces which can guide you through the process with their built in design tools which can allow you to add background colors, text, and resize images.
Even if they don’t have a snazzy interface, however, most printers will be able to share templates specifically designed for their greeting card sizes. DO download these, as they can be very helpful in formatting and sizing your artwork appropriately.
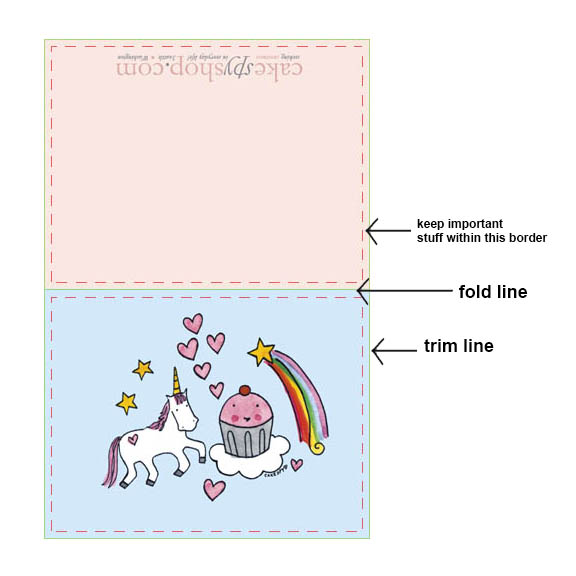
Typically, a template should include the following important info: fold line, trim line, and a “safe zone” border in which all important aspects should be contained. Don’t include important aspects right on the edge–there is a small bit of leeway during the cutting process, and you don’t want your logo or an important word to be cut off. See how the logo rests a little above the bottom of the card, in the “safe zone”, below?
Lay out your design within the template, but be sure to save the final image with the template removed: You don’t want those guide lines printed on your card.
Alignment tips
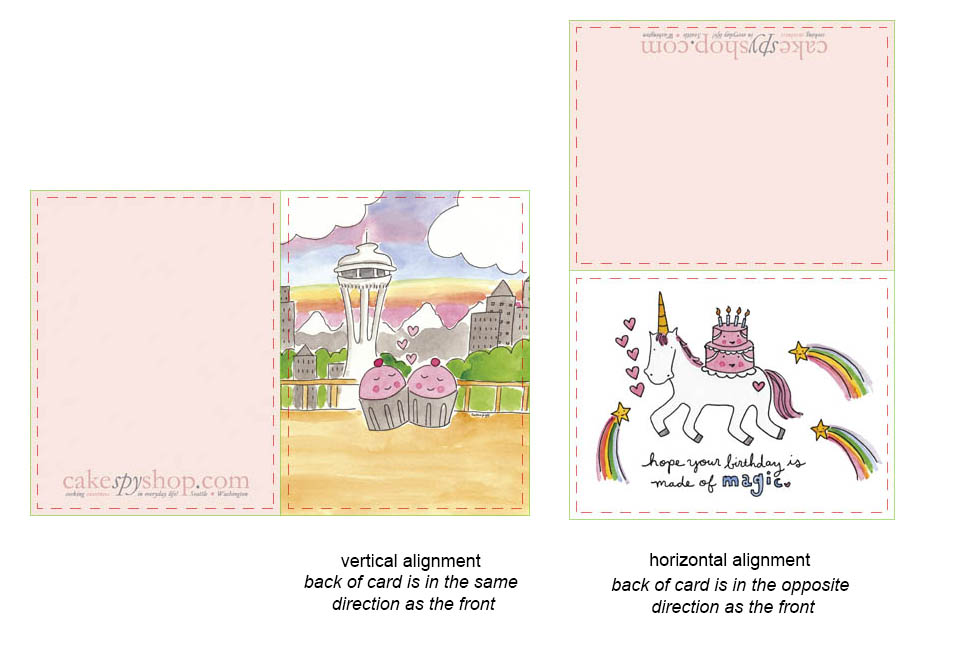
- Format your artwork to take up half of the surface area (the other half will be the back of the card; the front and back are actually printed on the same side, which is scored).
- Make sure that the artwork and back design is aligned so that they will face the same way once folded (so for instance, the logo on the back would look upside down when you view the artwork unfolded).
- If there is a greeting on the card, it should be about 1/3 of the way down the card if aligned vertically.
- Be sure that the most important elements of the design is not toward the edge. Because of slight shifting during cutting and printing, there is a small area (usually 1/8 inch or so) which you should leave as “bleed”–extend background colors so that they will have a little leeway when trimming, and nothing really important has the potential to be trimmed out.
Pro tip: Make sure that an enticing part of the design is prominently featured on the top third of your card. Many card displays are tiered so that only the top of a card is visible. Make yours enticing even if only a sliver is viewable.
Inner greeting

Use the same template for an inner greeting, making sure that you’re aligning it in the same direction as the artwork (it would be very strange to open a top-fold card and find the greeting sitting on its side). Most printers will allow you to upload the front and back as separate files.
Check twice, print once
Double check everything. Print out your finished file on your home printer, so that you can have a general idea of how the cards will look when they are printed.
A printer’s proof (their final printout before “going to press” with the file) is well worth a few extra days’ turn time and the nominal fee that most printers charge. This will be your final chance to “OK” the file before the entire job is printed.
Package your cards prettily
Make your cards ready to sell (and keep them safe) with plastic sleeves or boxes. Clearbags.com is a great resource for purchasing both boxes and sleeves to fit all sorts of card sizes.
Pro tip: If it is a greeted card, be sure to make a sticker that shows what the inner greeting is. If it is blank, make a sticker that says “blank inside,” otherwise people will pry open the boxes trying to find out!
<!–[box type=”shadow”]
Get better at what you love! Whether you want to create your own greeting cards or aim to render gallery-worthy watercolors, you can reach your true artistic potential with drawing and painting classes from Bluprint!
My daughter draws some great pictures. She has had problems with drugs and will be incarcerated 8 months. She draws in jail and sells art there also people ask her to draw pictures for them. I think this could be a great thing for her to try when she gets out. Do you recommend a certain type of printer? Or any other type of equipment? Thank you very much. Debbie
how much is it to turn your artwork into cards?
Ive been trying to sell my original art work on etsy but Ive got not bites and a friend suggested making cards. just want to know how hard is it. and do you have differnt quality cards (as thinkness ect)? Thank you
Thank you! this is helpful