

Photos via Boost Your Photography
Christmas and holiday light displays offer a fun opportunity for creating unique and memorable photographs. This post provides a quick step-by-step for shooting creative Christmas bokeh photographs.
What is bokeh?
Bokeh comes from a Japanese word for “blur.” Photographers use the term to refer to the quality of the out-of-focus areas of a photograph. Various lenses render bokeh effects differently, and some camera lenses are prized by photographers purely for the look of the bokeh that they create.
How does bokeh work?
 The key to producing beautiful bokeh is two-fold.
1. Shoot with your aperture open as wide as possible.
For example, a 50 mm f/1.8 lens (known colloquially as “the nifty fifty”) is often the first lens that a photographer will buy that produces a great bokeh effect.
Shoot in aperture priority mode or manual so that you can set your aperture to f/1.8. This will result in a very narrow depth of field. Much of the background of your photograph will then be out of focus, which creates bokeh.
2. Separate your subject from the background.
The farther your subject is from the background, the easier it will be to throw the background out of focus. A simple rule of thumb is to remember the ratio 2:1. Keep the distance between the subject and the background at least twice as great (2) as the distance from the subject to the camera (1).
If you do not have a wide aperture lens or are shooting with a point-and-shoot or phone camera, you can use your zoom to create a bokeh effect. Zooming closer in on your subject also makes the depth of field more narrow, throwing the background out of focus and creating bokeh.
How to use Christmas lights for fabulous bokeh
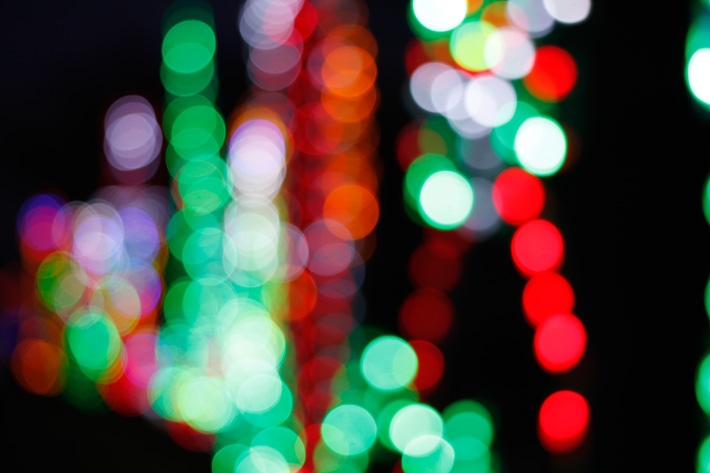
The hallmark bokeh effect is how small points of light become rendered as bright, brilliant circles. This is where Christmas lights excel. Each individual Christmas light is, in effect, a point source of light. Placing your subject in front of a Christmas tree, decorated house or simply a strand of Christmas lights can make for a lovely bokeh background.
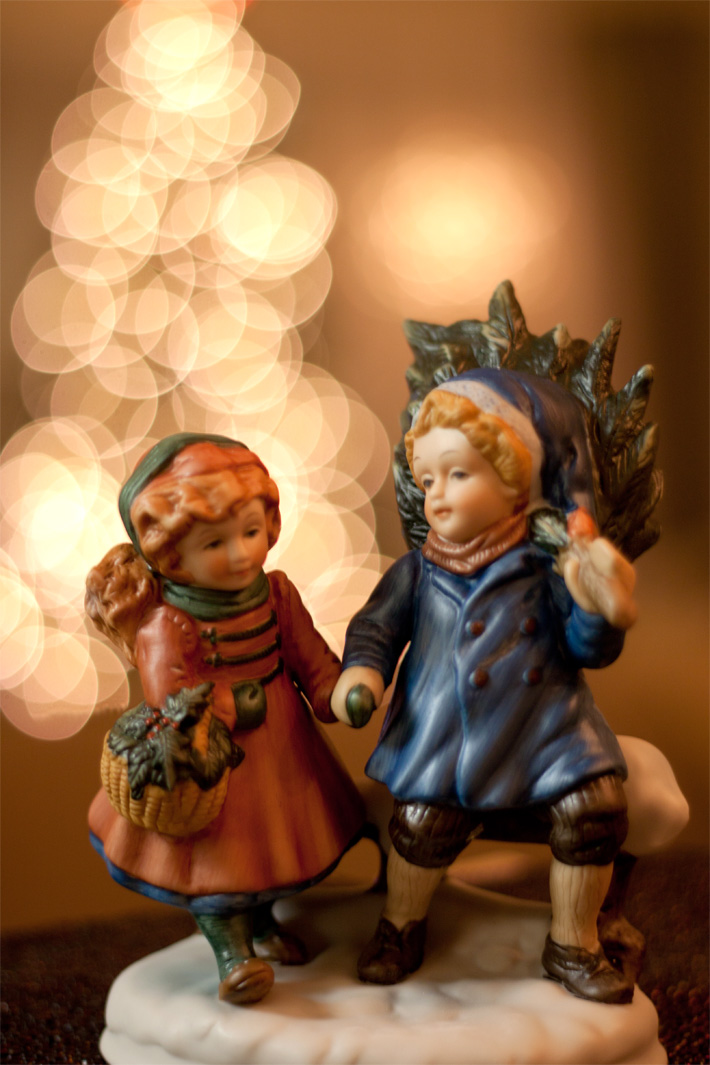
To create the photograph above, I used the Christmas tree in the background to provide the bokeh lighting and shape. The small statue was placed across the room from the tree, close to the camera. Shooting at an aperture of f/1.8 kept the statue in focus but the background blurry, and each light on the tree became a bright circle of light.
Bonus: Shaped bokeh using Christmas lights
A final twist on Christmas bokeh is to turn those bright circles into more unusual or festive shapes. The circle itself comes from the aperture inside your lens. The wider the aperture, the more it resembles a circle. The narrower the aperture, the more you see the blades of your lens shutting down. (My 50 mm f/1.8, for example, becomes a pentagon shape.)

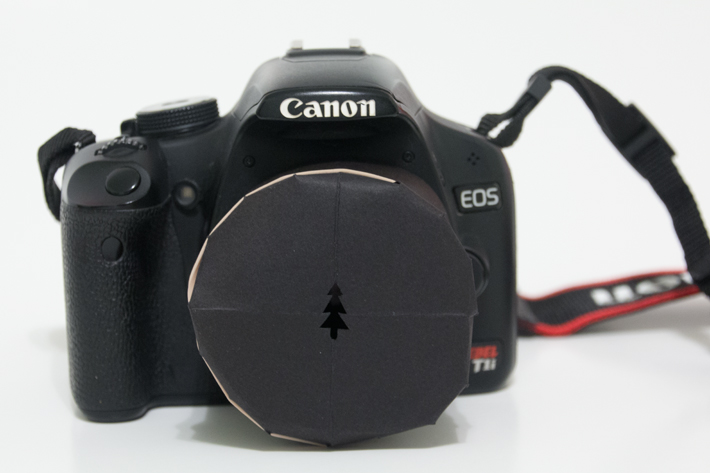
You can cut a small shape into black card stock to make a cover for your lens. Then, rather than a circle, the out-of-focus bokeh will become the shape of your cut-out. The trick is to make sure your shape is centered and small (less than 17 mm for a 50 mm lens).
Use a tripod (or another sturdy surface) to keep your camera steady. Much less light will make it into your camera, so you will need a long shutter speed. I usually start in aperture priority with f/1.8 and ISO 100 and let the camera choose the shutter speed. If I want a brighter picture, I can then dial those same settings into manual mode and then experiment with increasing the shutter speed until I get exactly the picture that I want.
Share tips, start a discussion or ask one of our experts or other students a question.
Already a member? Sign in
No Responses to “Merry & Bright: How to Take Trendy Bokeh Photos This Christmas”